05 September 2013

Fitness Challenge

I am 43 years old and most of my life I've been a lightweight 60kg at a height of 170cm.  Then my daughter came along 5 years ago and as a stay-at-home mum, I had a thrice weekly cake and coffee indulgence with my sister.  Loved the cake, coffee and especially the company but what I didn't account for is the weight that I gained throughout the pregnancy I was keeping on me from a fairly sedentary lifestyle and sweet yummies.

After stabilising at 73kg and my brother psychologically kicking me in the rear (of course with all the love that he could muster), 16 months ago I said enough.  I returned from an European trip, hubby bought me a juicer and without further ado I launched into a detox program for 5 weeks (see A Physical Wellbeing Journey - May 2012 - there are 5 weekly posts that describes my journey).

With a tunnel vision approach, I completed the program by losing 5.9kg with very little exercise.  Satisfied with my initial effort, I took off for Australia to spend time with my family and indulged some more, mostly in wine and after 5 weeks I returned home with an extra 1.5kg which I was okay with and it was to be expected, after all I do like to enjoy my life.

Fast forward to February 2013 and after a series of weddings, Christmas, New Year and birthday parties, I felt the need to detoxify my liver (I really do love my wine and a good drop of scotch) so I launched into another juice detox.  Only for a couple of weeks and I was a bit lighter with my approach.  Still no alcohol or sweets but I had one coffee per day.  I lost another 3kg and settled in at 65.6kg.

Four weeks ago, hubby and I concluded that it was time to start looking after our fitness now.  At 40+ with an energetic 5 years old girl we figured that it would be unfair to Trinity and to ourselves if we let ourselves go much longer.  It was time to build some muscle to keep osteoporosis at bay.

We now train 4 times a week by mixing it up and keeping it fun.  Anything from a gym workout to swimming, tennis, rollerblading, scooting, boxing and sometimes just walking (straight to our nearest coffee shop but it still counts).  With that I have moved another 1.4kg.

Four days ago, somehow I got roped into the "Biggest Loser Singapore 60 Day Fitness Challenge" by two of my delightful girlfriends.  An 8 week fitness challenge which is essentially won based on how much body fat one loses.  Well given that I'm already in the mid-range of normal for body fat, there's not much body fat % to move, so I figure the idea of the challenge is good to keep me motivated and keep me moving.  I have absolutely no expectation of winning when compared to some of the other contestants that have a substantial task ahead of them. I truly hope they apply themselves and use this opportunity to make a difference to their lives.

I had my weigh-in three days ago and these are the stats I am starting the challenge with:

Height: 170cm (5'7")
Weight: 64.2kg
Age: 43
Body composition: Fat 29.6%, Muscle 42.9kg, Bone 2.8kg, Water 50%
Metabolic age: 36
Waist to hip ratio score: 0.74

What does all this mean and what is the normal target range:
  • Fat % - for 40-59 yo which is my age range my fat % should be between 22 to 35%.  Check, I'm right in the middle of that but my aim is to get it down to 25%.  
  • Muscle Weight - this is my muscle ratio to my overall weight.  Normal is 50% of my weight or above.  Given that I weigh 64.2kg, I am well and truly well above normal at 66%.
  • Bone Density (keeping osteoporosis at bay) - Between 50-75kg it should be around 2.4kg.  Good, I don't need to overload on calcium for bone density.
  • Water Retention - 45-60% is considered normal, again I am in the middle so I can just keep up what I'm doing including the coffees I love drinking.
  • Waist to Hip Ratio = 0.75 and below is excellent, 0.75-0.80 is good and so on.  I am at the top end of the excellent range.  There's room for improvement here since I would prefer to be below.  I have a pear shape, so moving some inches from my hips would make me that much happier and that much easier to buy clothes.
  • Metabolic Age - this is the condition of my body compared to my age.  Given that I am 43 and my Met Age is 36, I have absolutely no complaint here.  Apparently the more fat I move, muscle I gain, increase my water the lower my Met Age can be.  Of course it makes sense, since the fitter you are the better you look or feel.
What does all this mean to me? What is my objective? When I review all the stats it looks like I'm a healthy person on the inside.  On the outside I am a little soft around the middle and wide on my hips.  Before the stats I had a view of losing weight that's what I thought I needed.  After the stats I realise it's about toning all the soft bits and gain energy for health, for my family, for my state of mind and to move towards those golden years in an awesome shape.

So along with my Challenge buddies, I started my first day of training by swimming 30 minutes and covering 400m in the morning and cycling 10km for an hour in the evening.  The second day we hit the gym for a 10 minute treadmill warm-up followed by an upper body workout.  Today, I'm off to a Zumba class followed by a boxing session tomorrow.  This'll wrap up my first week and I'll leave the weekend to rest.

The babes working out followed by spa time to cool the muscles.


06 May 2013

Art Projects with Young Children (3-5 years old)

My daughter is 4.5 years old and we have been dabbling in arts and crafts for some time. 

Her first project was scribbling with coloured pencils on paper when she was just 18 months old.  From there we moved onto Crayola's Pip-Squeak markers, Faber Castell's bucket of markers and crayons.  Lots of colouring of pre-printed princesses and animals grew out of these wonderful products until Trini showed interest in painting.  A whole new world opened to us and our art sessions kept pushing both our boundaries as we both learned and continue learning along the way.

There is no better time to expose children to the wonderful world of arts and crafts than toddlers.  They are curious, don't mind getting their hands dirty, love their scribbles and are not judgmental about their imperfections (as a matter fact they believe that their artwork is perfect, which is brilliant for their confidence and sense of wonder).

However, this exposure requires a parent's dedication to spend time with the toddler, to guide them through the projects as opposed to leaving them to their own will.  It could get messy but mostly it could create frustration if the child is unsure about what to do.

When Trini and I first began we had a handful of basic supplies that we could work with:

Crayola Washable Paints (10 pots) - non-toxic

This pack of 10 retails for approx. SGD$16
Roller sponges - get a few so you don't have to wash them so often when changing colours


Brush sponges - get a few so you don't have to wash them so often when changing colours

Drawing pads - at least 135gsm to make the paper thick enough to take the paint without tearing

This pack of 5 retails for about SGD$6 from the Popular Bookstore
Disposable plastic cups - one for each colour
Disposable paper plates
Potato - for stamping
Marshmallows - cylinder shaped for stamping (make sure there are extras for eating)

Project 1 - Cup Stamping

Using the paint pots, pour a dollop of the chosen colours on a disposable plate.  Dip the rim of a disposable cup in a chosen colour and have your child randomly stamp the paper.  Alternatively, stamp in an organised manner but that will require greater direction from the parent. 

Random stamping
Organised Stamping
Trini took charge by combining colours on the rim of the cup
and using the opposite end to stamp inside the larger ring.

Project 2 - Sponge Rolling

Using the paint pots, pour a dollop of the chosen colours on a disposable plate.  Using a different sponge roller for each colour (or if you only have one make sure you wash the sponge well between colours) roll the sponge in chosen colour and let your child roll randomly on the paper. Encourage your child to change colours regularly and keep rolling until the whole paper is filled.


Project 3 - Sponge Brushing

Using the paint pots, pour a dollop of the chosen colours on a disposable plate. Using a different sponge brush for each colour (or if you only have one make sure you wash the sponge well between colours) roll the sponge in chosen colour and let your child roll randomly on the paper. Encourage your child to change colours regularly and keep brushing until the whole paper is filled.


Project 4 - Potato Stamping

Using the paint pots, pour a dollop of the chosen colours on a disposable plate. Cut medium size potatoes in half.  Each half is per colour used.  Don't have a potato too large for your child's hand.  Dip the potato in paint and have your child stamp away. 

Some alternative options are for you to draw and paint a tree trunk with branches and then your child stamping randomly on the branches, creating flowers like cherry blossoms or cut a shape out of the potato base like a star or heart and then stamp.  We stuck to the cherry blossoms which proudly hangs in my sister's home office.

Just simple stamping
Cherry Blossom Tree
Project 5 - Marshmallow Painting

Click on link for instructions: 
http://red3-red3.blogspot.sg/2012/08/marshmallow-painting.html

Same as potato stamping but more fun cause you can eat
the ones not used for painting.

Project 6 - Koi Fish Finger Painting

This project is perfect for using up leftover paint.  Dip your child's finger in paint and randomly swipe the finger on paper producing the impression of Chinese Koi Fish (aka Carp Fish). 

Trini enjoyed this process because she got to use her fingers.

Let me know how you went with your own projects.  Did you come up with any new ideas?

Next time I hope to write about finger painting using Crayola's Washable Finger Paint tubes which are completely non-toxic and safe for little ones.

Hard at work with sponge brushing.


19 April 2013

Butterfly Garden Project

I came across this cute kids project that included cupcake paper moulds as flowers.  It looked easy enough to make I just didn't anticipate what a major project it would become and how Trini and I took it from simple to super embellished.

Our cupcake mould inspiration.
Our final product.

Supplies:

A2 heavyweight paper
2 x 5 different coloured patty pan moulds (you can use patterned ones as well that complement one other)
2 yellow patty pan moulds for the sun
6 large coloured buttons big enough to fit on the base of the mould
6 small coloured and shaped buttons
5 coloured popsicle sticks
3 coloured felt butterflies or use butterfly stickers
cut 10 leaves out of patterned or plain green paper
Crayola water based glue
glue stick
ladybug stickers
felt flower stickers for the border or just use normal flower stickers (optional)

Instructions:

1.  On the heavyweight paper arrange the pieces until you are happy with the flower garden layout.

2.  Glue the popsicle sticks down first as it gives you the floral spacing and foundation to work upwards on the page.

The pink popsicle stick is being prepared.

3. Grab two patty pan moulds of differing colours.  Turn one of them inside out.  Apply glue to the interior of the mould that is the right way then add the mould turned inside out together and let it dry.  Repeat process with the rest of them.  Make sure that the sun is a combination of two yellow moulds.

Applying glue to inside of patty pan mould.

4.  Apply glue to the large button and place inside of mould in the centre.  Then apply glue to small button and add to the top of the large button.  Repeat process with all the buttons.  For the sun use two yellow buttons.  Set aside to dry.

Applying glue to the big button.

Adding the buttons to the gluey mould.

5.  When the moulds are dry, apply glue to the bottom of each mould and place at the top of the popsicle sticks.  Adhere the sun mould in the top right of the heavyweight paper.

Applying glue on the bottom before adhering to paper.

6.  Apply stick glue to each leaf and position in place, one on each side of the popsicle stick.

Applying glue to leaves.

7. Now is time to embellish with felt stickers or normal stickers.  Add the butterflies above the flowers and the ladybugs in and around the garden.

Some of the felt stickers were a little tricky to handle.

8. Optional - Embellish the frame with more felt stickers or use normal stickers.

Adding the finishing touches to the frame.
Trini and our joint project.

This project is fiddly and time consuming.  However, I found that the gorgeous colours, buttons, butterflies, ladybugs and paper moulds were just the right ingredients for Trini to remain focused throughout the lengthy process of producing her Butterfly Garden.

Now that you know how to do it, give it a whirl.  Make it as simple or complex as you wish.  Share with us your project and tell us what you got out of it, besides a pretty indoor garden.

07 April 2013

Hand Leaves Tree Project

Here's a really cool project I found on the internet when I was searching for kids paper crafts.  I recently purchased a bunch of craft bits and pieces from a friend for Trinity, which included a collection of 15 x 15 cm patterned paper squares. 

The pretty patterned squares.
They were the perfect size for cutting out shapes of Trini's hands with little wastage.  Actually don't throw out the paper off-cuts as you can use them on another project that we will be working on soon and I'll post the instructions at some point.

Supplies:

Patterned or coloured paper (enough to cut out 12 hands, ie A4 size then have 6 sheets) 
A2 heavyweight paper
Crayola brown, light blue and white pots of paint (I use Crayola because they are non-toxic and safe for Trini)
A4 size cardboard to create hand template (cereal box would be perfect)
1 x wide paintbrush for the large surfaces
1 x narrow paintbrush to tidy up edges
Paint tray or disposable plate
Pencil and eraser
Glue stick
Scissors
Green sticky felt border (optional - it just provides detail)
Brown fine point permanent marker (optional - it just provides detail)

Instructions:

1. On the cardboard trace your child/children's hands and cut out.  Store the hands either for other hand projects or stay tuned for a project we'll do embellishing the hands and turning them into their own craft.

Cardboard hand templates.

2. Use the cardboard templates to trace 6 left and 6 right hands onto your coloured or patterned paper, then cut them out.

3. On the A2 paper place the hands like leaves approximately in a semi-circle shape then when satisfied lightly draw a tree trunk with branches meeting with the hands.  (If you have a good look at the image below you'll notice that my branches were far too big and the hands didn't fit all that well.  That's because I drew the tree first and then tried to fit the hands on the page.  Since it didn't work, I did it the reverse way by placing the hands first and then drawing the tree and branches.  Much better.)

Arranging the hands until I was happy with the look.
Take a photo of the placement so you can refer back to it.

3. Remove the hands from the sheet and with a pencil connect the lines so that the tree branches are defined.  I know this may seem a little fiddly, however, I prepared this part in the evening so that it was ready for Trinity the next morning to just get into it.

Pencil outline and ready to be painted.

4.  On a paint tray or disposable plate pour a little brown and instruct your child to paint the tree with the wide paintbrush.  Use the narrow paintbrush to fill in gaps and straighten out edges (you may want to do that if your child is too young for this detail).

5.  Clean the brushes when done and then paint with blue.  I added some white to the blue to lighten it a bit but you don't need to if you're happy with the colour.  Trinity enjoyed the process of mixing the two colours with the opposite end of a paintbrush.

The foundation is complete and ready for the
hand leaves to be glued.
6.  Use the photo to guide you where to place the hands onto the tree.  Take one hand at a time and with a glue stick instruct the child to run the stick across the whole hand then put the hand back in place and smooth with your hands.  Add more glue to parts that are not sticking down.

7.  With the brown marker draw some adhoc lines on the tree trunk to give it more detail.  Otherwise it looks a little bland when compared to the hand details.  Daddy has a very steady hand so we roped him into drawing the lines for us.

Thank you Daddy for spunkying up our tree trunk.
The Hand Leaves Tree is finished.
8.  You can stop at this point, put your initials and date on it and hang it up somewhere with blu-tac to enjoy.  However, we took it a step further.  We happened to have green felt border that can be stuck directly to the project once the paper was peeled off the bottom.  Not fun and certainly not for children to try.  It is very fiddly but we knew it would look pretty.  So if you have access to some cut it to size and stick it on.  Alternative items that you can use are ribbons, scrap fabric, buttons or green paper.  Any one of these items will add texture and interest at the bottom of the page.

Why me?? How did my girls rope me into this??
Felt border added for some extra texture.
We added our initials inside the flower on the bottom right.
This project can be simplified for little ones by cutting out 4-6 hands on colour paper, draw and cutout a tree trunk from colour paper and then getting your child to glue the ensemble onto a background sheet.

This simple exercise develops their dexterity, focus and concepts of how bits put together can create a picture.  Their sense of accomplishment will be visible on their faces and you can encourage them to show their picture to a friend or family member (in our house it's usually Daddy) and talk in simple words about how they did it (talking about it reinforces the learning experience for another time).  The key is to keep the whole exercise simple filled with encouragement.

02 April 2013

Red Seashell Heart - Project with my daughter

The idea of the love heart was borne out of a day my pockets were full of seashells I collected whilst waiting for my daughter to finish her art class.  When I showed her the seashells she oohed and ahhed just like any other 4 years old little girl.

Once at home we cleaned and dried the shells and then admired the pretty colours, different shapes and unique markings on each one of them.  The ones Trini liked the most she put away in a bucket as a private collection whilst the rest was to be used for our project.

Grabbing a 25cm x 25cm square canvas, I showed Trini how it might look if we placed the shells in the shape of a heart.  She loved the idea and from there we just experimented and built on it one step at a time, given that we didn't actually know how to pull it all together.

Not a project I would usually recommend for a 4 years old who lives in the now, with short-term concentration and limited focus but this project was far too tempting and Trini wasn't left on her own.

The one thing that I discovered with her is that by working on the project in stages over a period of days, she didn't seem impatient or unfocused.  She seemed to genuinely enjoy the process of painting one day, gluing another day, painting again, and so on.  It took us about a week to complete but we were both pleasantly surprised with the outcome, so much so that we have already worked out the next project with seashells: a rainbow with white clouds and yellow sun.  Quite ambitious as it'll require more colours to paint with, more organising and work on a larger canvas in order to fit a rainbow on it properly.

Anyway here is our experiment, one step at a time:

Supplies:

Seashells of mixed sizes and shapes (lots and lots of them)
25 x 25 cm square canvas 
White acrylic paint (optional - see instructions below)
Red acrylic paint
2 paintbrushes
Toothpicks
Crayola Washable School Glue (it's easy to clean off little hands)
Pink glitter paint (optional)

Instructions:

If you don't live near the beach then make sure you have a substantial collection of seashells.  Rinse them to dispose of any leftover sand and leave them to dry.

Lay out some newspaper and paint the canvas with white acrylic and set aside to dry.  I know it's already white, so you don't have to if you see no sense in it.  I just preferred to do that. 

Grab the seashells and with the red acrylic, paint each one of them.  Place them on the  newspaper and let them dry.  It's a messy process as you can see from Trini's hands below but a fun one for any child. 


Painting small seashells develops a child's dexterity, attention to detail, patience and gentle painting rather than enveloping the shells with gobs of paint.

Our shells in drying process.

Guide your child in placing the shells on the canvas in a heart shape and organise them until satisfied with the outline.  Once done, grab the glue and squeeze some on a disposable plate.  Take a toothpick, roll one end in the glue, grab a shell used to outline the heart and gently dab the glue on the edge of the unpainted end, then put it back down on the canvas where you got the shell from.  Continue this step all the way around the outline.

Trini adding the glue on the unpainted side
with toothpick dabbed in glue.

The glued shells on the canvas nearing completion.

This next stage is a bit easier.  Have your child hold the glue bottle and squeeze it inside the heart outline making sure the glue covers the whole area.  Guide your child's hand if needed and ensure that the glue is reasonably even rather than gobs in places and thin in other.

Glue adhered to the inside of the heart outline.

This part is quite fun for the child as he/she applies the shells to the glue.  The key here is to have the shells touching each other and filling in the gaps.  Kind of like completing a jigsaw puzzle.  Adjust discreetly as needed whilst allowing your child as much freedom as possible to complete this part of the project.  Once done set aside for a day to dry. 

Jigsaw time.  Filling in the gaps.

We ran out of shells so we spent a wonderful afternoon on the beach collecting more.  This time Trini was participating which made it more fun for her as she felt that she contributed to the collection process.  We are fortunate to be living in a condo across from the beach making it easy for us to collect whenever we need to.

Collecting more shells.

With a topped up collection and more painting, we placed another layer of shells squeezing a lot more glue.  This gets a bit tricky for a child as it needs an eye for detail, so help by directing where the shells should be placed on the heart.

When completed have the adult generously squeeze glue between the shells as shown below to ensure that the top shells will adhere to the bottom layer.  Set aside for a couple of days for the glue to dry and cure. 

Generous amount of glue are added to ensure the
shells adhere to one another.

Crayola glue usually dries clear when applied in small quantities.  Due to the generous application for this project the glue dries cloudy so it is necessary to paint the glue and apply another coat on the shells.  Have your child paint the interior shells whilst you paint the outline shells to ensure no red paint ends up on the canvas.

Applying red paint to the glue and another coat on the shells.

At this point you can stop, let the paint dry and put it on display.  We went a step further as we had glitter paint in the cupboard in pink, red and gold.  We applied each colour to sample shells to see which effect we liked the best.  According to Trini, the pink was the best option so that was our chosen colour.  We applied the pink glitter glue with Trini painting the interior and me painting the outline.

Glitter glue being applied.

Once applied let it dry for a couple of hours and then apply a second coat.

I'd like to have used a glossy varnish but we didn't have any so for now it's on display as is.  Maybe the next time we go to an art shop we'll get the varnish and give the artwork a couple of coats.

The pink glitter paint has softened the brightness of the red.

This project may seem complicated but when broken down into stages it makes for an easy and fun project that is worth the effort.  Besides the abovementioned skill developments, your child may also realise how an artwork can be created out of simple items such as shells, a little paint, glue, canvas and some patience.

30 January 2013

Abrakadoodle Art Classes for Children

Kids on Canvas Art Camp - October 2012

Founded in 2002 in the United States by two education and franchise experts, Abrakadoodle to date has been the winner of 7 Nickelodeon First Place Awards for “Best Art Class to Bring Out Your Child’s Inner Picasso”.

A comprehensive art education international franchise with locations in US, Singapore, Malaysia, Japan and China, Abrakadoodle’s art classes are for children from 20 months to 12 years. The programs are designed with the process of creating art rather than the outcome of the art, whilst the curriculum was developed by artists and educators with focus on developing right brain competencies. 

The same classes are never repeated, giving the child new and exciting projects to look forward to. My daughter relishes telling me each week that she doesn’t know what she will be doing in art class. It is like a weekly dose of surprises.

Only one hour long, once a week, the projects are designed to be completed in one sitting, keeping the excitement and momentum going, whilst providing the child with satisfaction of going home with a finished product. The last 15 minutes of class is dedicated to gallery time when each child talks about their art work before an audience who are generally the students’ parents.

Along with regular weekly classes, Abrakadoodle runs art camps usually during school holidays.  Trini has successfully and with much pleasure completed 3 art camps.  Each one had its own theme, run over 3 days for 3 hours per day.  At the end of each camp, Trini produced 6 pieces of art which are completely original.  By far my favorites are the work from her Kids on Canvas camps where she learned about painting on canvas using acrylics.  In Abrakadoodle's words: "Children use their imaginations in creating artwork based upon the techniques, style and vocabulary of master or contemporary artists from different parts of the world!" Too true.

Such artists include: Pierre Renoir, Piet Mondrian, Laurel Burch, Amedeo Modigliani, RenĂ© Magritte, Andy Warhol, Mort Solberg, Jane Freilicher, Roy Lichtenstein, Natasha Westcoat, Johannes Vermeer and Yin Lum.  Each accomplished artist imparts an artistic style or technique such as: Renoir is synonymous with Impressionism, Magritte with Surrealism, Lichtenstein with Pop Art and Vermeer was a Provincial painter known for the Girl with a Pearl Earring painting.  Yin Lum is a contemporary abstract artist hailing from Singapore, whilst Mort Solberg is an American artist with an affinity for American Indian history and culture.

Trini has been part of Abrakadoodle for about seven months and I remember her first piece of work which was using sponging and layering techniques to produce Peek-a-Boo.


A few months later Trini experienced her first Kids on Canvas camp and below is my favorite being Trini's interpretation of Rene Magritte's well known Son of Man painting which consists of a faceless man with a bowler hat.


The following week Trini concluded Abrakadoodle's Beach Camp where their art work had a beach theme using various mediums such as paper, sand, clay and screenprinting.

The students' collective work. 
The Sea Shell designs are my favourite.
After a couple of months abroad, Trini kicked off the new year with another Kids on Canvas camp and resumed her regular weekly classes.  More fun ensued and here's her most recent works.

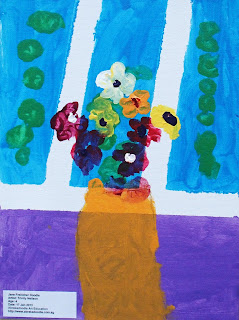
Inspired by Jane Freilicher

Inspired by Mort Solberg

Inspired by Roy Lichtenstein

I don't know how much theory Trini takes in but I know that she is having loads of fun.  I suspect over time, everything she learns and is exposed to will slowly start making sense.  I most certainly notice her work getting more creative, the art more defined (less blobs) to the viewer and her colour combinations (which often reflect pink and purple) are aesthetically pleasing.

My objective as her mum is to delight her with creative opportunities, give her art related outlets to express her imagination and essentially let her dream a beautiful world for as long as possible.  As Pablo Picasso once said:

Every child is an artist.
The problem is how to remain an artist once we grow up.